If you've ever wondered why luxury cars sound so refined while economy cars rattle and resonate, the answer isn't engineering magic or expensive parts. It's a few extra millimeters of butyl mat on the door skins, a layer of mass-loaded vinyl in the floor, and a closed-cell foam on the firewall. Total cost to the manufacturer: maybe $200 in materials. Total perceived value: thousands of dollars in "premium feel."
You can add the same materials to almost any vehicle for a similar effort, and the results are dramatic — both for ride comfort and for car audio. In fact, sound deadening is the upgrade that quietly does the heavy lifting in every great-sounding car audio system we build. Skip it and you'll always wonder why your nice speakers sound thin. Do it right and even modest speakers come alive.
Here's everything you need to know.
What sound deadening actually does
The term "sound deadening" gets used as a catch-all for three different jobs, each requiring different materials:
- Damping — stops thin metal panels from vibrating like a drum head
- Decoupling — stops mechanical noise from transferring through structures
- Blocking — stops airborne sound from passing through panels
A serious sound treatment uses all three layers in the right places. A consumer-grade "kit" you buy at the parts store usually only does one (poorly) and skips the others.
Let's break each one down.
Damping: the butyl mat layer
Butyl-rubber mats (Dynamat, SoundSkins, Second Skin Damplifier, RAAMmat) are the foundation of every install. They're thick adhesive-backed pads, typically 60–80 mil (1.5–2 mm) thick, with a foil backing.
The job is simple: stop the door skin, trunk lid, floor pan, or roof panel from acting like a speaker cone in reverse. An untreated door skin vibrates from speaker movement, from road noise, and from engine resonance — every one of those vibrations is energy that becomes audible noise.
A butyl mat applied to the inside of the panel converts that vibration to a tiny amount of heat, instead of letting it become sound. The result: midbass that hits harder, road noise that drops 3–5 dB, and a door that closes with a satisfying "thunk" instead of a tinny rattle.
Coverage matters. You don't need 100% coverage to get most of the benefit — about 25–40% of the panel surface, applied in patches across the largest flat areas, kills the vast majority of the resonance. Going past 60% coverage adds weight without much additional benefit.
Where to apply:
- Inside the outer door skin (the visible body panel) — the highest-impact location
- Inside the inner door panel (behind the trim) — second highest impact
- Trunk lid and floor
- Rear deck (the panel under the rear window)
- Roof — center 60% of the area
- Floor pan, especially under front seats
- Behind the firewall (carefully — heat-rated mat only)
Where NOT to apply:
- Directly over wiring harnesses
- Over moving parts (window regulators, door latches)
- Inside the engine bay (unless using a heat-rated mat)
- Anywhere that needs to dissipate heat (rear of an amplifier, near exhaust components)
Decoupling: closed-cell foam
After damping the panels, the next layer is closed-cell foam (CCF) — typically 1/4" thick adhesive-backed sheets. Brands: Second Skin Luxury Liner, Dynaliner, SoundSkins CCF.
Decoupling foam goes between hard surfaces that touch each other. Its job is to keep mechanical vibrations from transferring through the structure of the car. If the inner door panel touches the outer door skin at certain points, vibrations move between them. Add a layer of foam at those contact points and the transfer stops.
Foam also helps with airborne sound by absorbing a small amount of mid-frequency noise, but its primary value is decoupling.
Where to apply:
- Behind every door trim panel (full coverage)
- Behind dashboards
- Inside roof panels (over the butyl mat)
- Behind kick panels
- Anywhere two panels touch
CCF is cheap, easy to install (peel and stick), and adds almost no weight. There's no reason to skip it once you're already in the doors for butyl mat.
Blocking: mass-loaded vinyl (MLV)
The third layer is mass-loaded vinyl — a dense, limp sheet of vinyl loaded with mineral particles to add mass. Typical thickness: 1/8" weighing about 1 lb per square foot.
MLV blocks airborne sound the way a wall blocks sound between rooms. Engine noise, road noise, exhaust drone — all of it has to pass through panels to reach your ears. Add MLV between the noise source and your ears and you cut significant decibels.
Where to apply:
- On the floor pan, under the carpet (engine and road noise)
- Behind the firewall (engine noise)
- Inside the trunk floor and wheel wells (road and tire noise)
- Inside the headliner (rain noise on metal roof)
MLV is the heaviest of the three materials — a full-car treatment can add 40–80 lbs to the vehicle. For most customers that's a non-issue. For weight-conscious performance vehicles, we use targeted MLV only at the highest-impact spots (firewall and floor under front seats).
The complete recipe for serious treatment
If you want a properly deadened vehicle for both audio and ride comfort, this is the layer-by-layer recipe:
Doors (all four):
- Butyl mat on outer door skin (30–50% coverage in patches)
- Butyl mat on inner door skin (around speaker, behind handle)
- CCF foam fully covering the back side of the door trim panel
Floor (front and rear):
- Butyl mat on the floor pan in 30–40% coverage
- MLV laid over the entire floor pan, under the carpet
- CCF gap-filler around tunnel and seat mount areas
Firewall:
- Heat-rated butyl mat on the cabin side
- MLV layer over the butyl (only on cabin side)
- CCF over the MLV if room permits
Roof:
- Butyl mat on the center 60% of the roof skin
- CCF over the butyl mat
Trunk / hatch area:
- Butyl mat on trunk lid, rear deck, wheel wells
- MLV under trunk floor mat for cars with prominent road noise
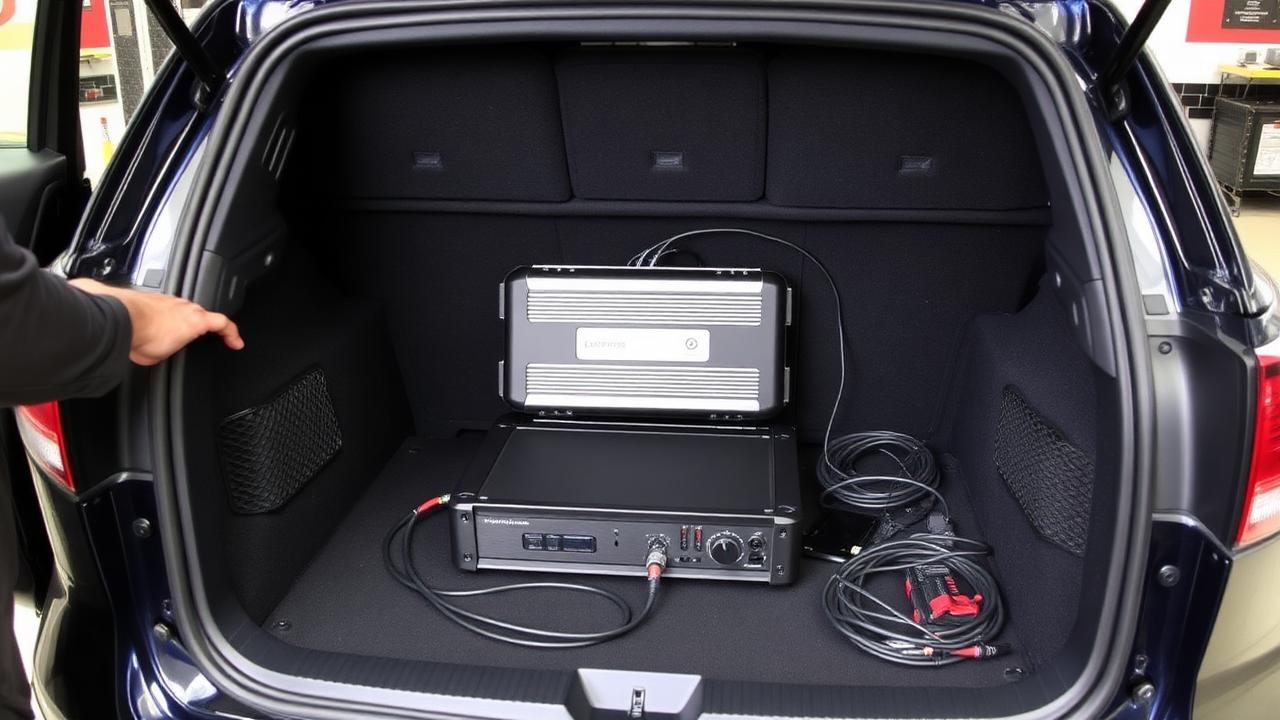
A treatment at this level costs $1,500–$3,500 in labor on most vehicles, plus $400–$800 in materials. For someone building a high-end audio system, it's the most cost-effective single upgrade in the entire build.
Why your speakers need this
Here's the part car audio enthusiasts care about. A speaker is a transducer — it converts electrical signal into air movement. In a car door, the speaker fires into a partially sealed cavity (the door interior) before the sound reaches your ears. That cavity acts like an enclosure.
If the door is untreated, three things happen:
- Pressure leaks through every gap, hole, and unsealed seam — bleeding off the air the speaker is trying to move
- The door skin vibrates in sympathy with the speaker, adding its own resonance to the sound
- Reflections inside the door cavity create comb-filtering that smears midbass detail
Sound deadening fixes all three. Butyl mat on the outer skin turns the door into a proper baffle. Sealing the inner door panel openings with CCF or foil tape creates a real enclosure. The speaker now plays into a controlled environment instead of a leaky tin can.
The audible difference is shocking. Same speakers, same amp, same tune — but in a deadened door they have actual midbass weight, vocals lock to the center, and you can run the system at high volume without things sounding strained. We do A/B demos in the shop where customers listen to identical $400 speakers in a treated door and an untreated door, and the treated set sounds like a $1,200 system.
DIY vs professional install
You can absolutely DIY sound deadening, and many enthusiasts do. Here's where DIY tends to fall short:
- Coverage decisions — knowing where to apply and where to skip
- Trim removal — modern cars have hidden clips, harnesses, and airbag wiring that are easy to break
- Cleaning prep — surfaces have to be alcohol-wiped or the adhesive won't bond
- Sealing the inner door — the most-skipped step, and the highest-impact one for audio
- Re-assembly — wires routed wrong, clips not seated, trim creaks introduced
If you're handy and patient, DIY for a single door takes about 4 hours of work and runs $80–$150 in materials. A full-car DIY weekend can save you $1,500 in labor.
If you'd rather have it done right the first time without learning, professional install runs $400–$800 per door fully treated, and a full-vehicle treatment runs $2,000–$4,500 depending on size and complexity.
Common myths to ignore
Myth: "Spray-on deadener works as well as butyl mat." No. Spray-on products are useful for hard-to-reach spots like wheel wells, but the damping is less than half as effective as a quality butyl mat per pound of material.
Myth: "Aluminum foil bubble wrap is sound deadening." No. The shiny bubble-wrap material sold cheap online is thermal insulation, not sound deadening. It has almost zero damping effect. Test: bend it and it makes noise. Real butyl mat is dead silent when bent.
Myth: "More is always better." No. Beyond about 60% coverage with butyl mat on a panel, additional material adds weight without additional benefit. Smart placement beats brute coverage.
Myth: "Sound deadening makes the car feel cheap because it's heavy." No. A well-treated car feels more premium, not less. The doors close better, the chassis feels more solid, and road noise drops noticeably. Customers regularly tell us their daily commute feels less fatiguing afterward.
Myth: "You can deaden a car after the audio install." Technically yes, but you'll be paying to remove all the trim twice. Always deaden during the audio install when the door panels are already off.
When to do it
The two perfect moments:
- During a major audio upgrade. The panels are already off. The labor overlap saves you significant cost. The audio system performs dramatically better. No-brainer.
- When buying a new vehicle that has too much road or wind noise. Especially common in trucks, vans, and sports cars where the manufacturer skimped on factory treatment. A targeted treatment of the floor pan and firewall on a noisy truck can drop highway cabin noise by 5–8 dB — that's literally cutting perceived noise in half.
The wrong moment: after every other audio upgrade is done. Going back to remove trim that's already been refitted twice is painful and expensive.
Where to start
If you're building an audio system, talk to your installer about deadening before the system goes in. We always include it as a line item on serious builds and explain what the customer will and won't get if they skip it. If you're not building an audio system but the road noise in your daily driver bothers you, we can do a targeted floor and firewall treatment in a single day that makes a noticeable difference for $1,000–$1,800.
Either way, sound deadening is the upgrade that pays for itself in how the car feels every single time you drive it. It's the upgrade we wish more customers asked about — and the one nobody who's done it ever regrets.